Clients
General information
CDP is the core of the Sailplay platform. It is responsible for storing all accumulated client data and provides the tools required to work with that data. CDP affects other product areas as well, so CDP entities are used across Loyalty, Communications, and Analytics.
Client list
The Clients section is used to work with the client database transferred to Sailplay. Data can be filtered using three main groups:
- client filters
- purchase filters
- aggregations
Search
Clients can be searched through the search bar by:
- full name
- ID
- phone number
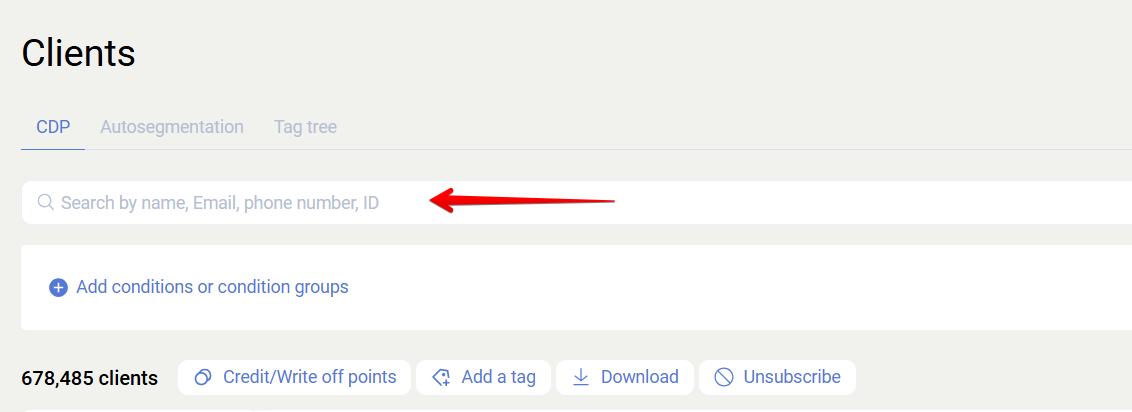
Phone search works best in the 79999999999 format.
You can also search for several clients at once by separating values with spaces, for example 79999999999 79999999998 or Evgeny Pavel.
Filtering
Filtering is configured through Add conditions or groups of conditions. Data can be filtered using:
- Client filters - data directly related to clients in the database
- Purchase filters - data related to client purchases
- Aggregation - predefined aggregations that can be refined with purchase filters to build more precise segments
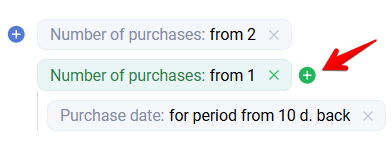
Several filters can be added within one row. New conditions are added with the plus icon. Conditions inside one row are combined with AND.
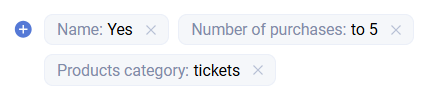
In this example, the goal is to find clients who have a name AND made up to 5 purchases AND bought Nike products.
You can also use OR by adding another filter row:

There is no limit on how many such blocks can be added, which makes it possible to build complex selection logic for segment creation.
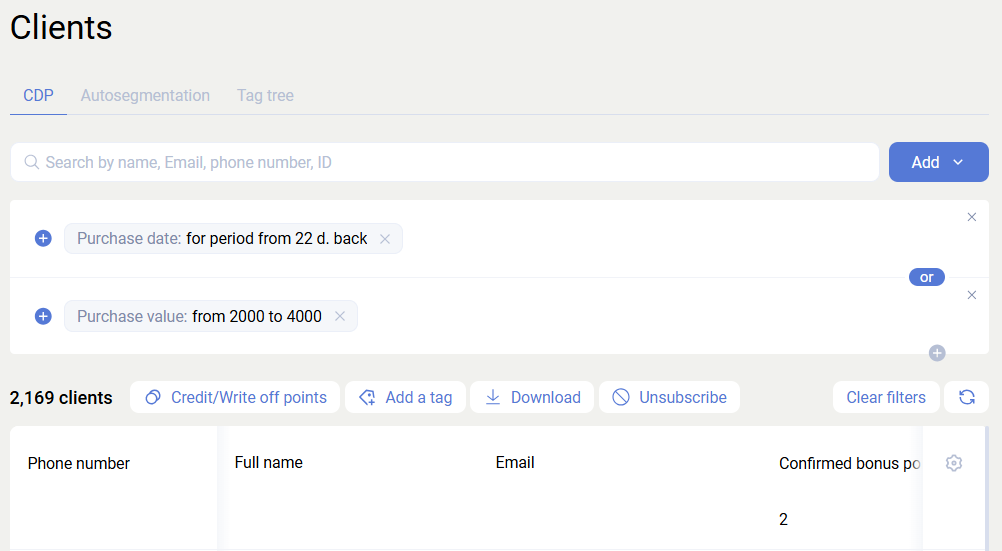
Example: clients who made from 1 to 10 purchases OR made a purchase between 100 and 1000 rubles.
Aggregations are also available in filters. To use them, choose Aggregation in the filter and select the required conditions.
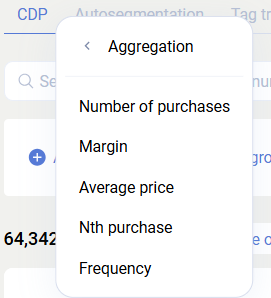
For example, you can filter clients who made from 1 to 3 purchases, have an average receipt from 30 to 50 rubles, and paid for those purchases in cash.
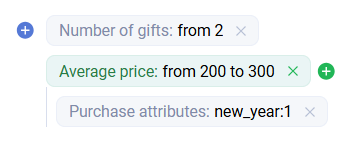
To add new filters outside an aggregation, use the blue plus icon. To add filters inside an aggregation, use the green plus icon.

The payment_method purchase attribute is not a system attribute. It is used here only as an example.
Bulk actions for clients
The result of the filtering logic is a list of clients that match the specified conditions. Bulk actions can be applied to the clients shown in the current selection:
- Accrue / deduct points - bulk bonus point accrual or deduction rules
- Assign tag - choose a tag from the tag tree and assign it to the selected audience. In practice, assigning a tag means creating a segment
- Unsubscribe - bulk unsubscribe from SMS or Email mailings
The Assign tag action does not launch trigger scenarios.
Downloading the client list
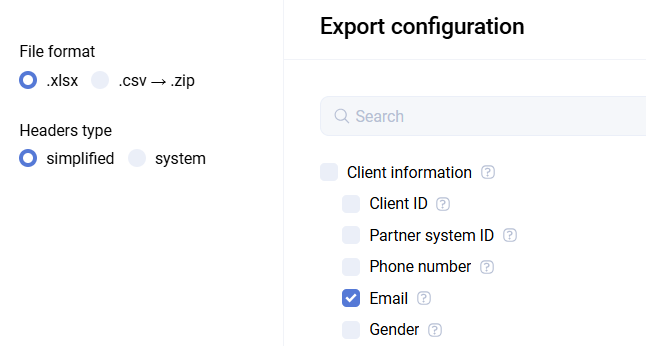
The filtered data can also be exported using Download. This opens a menu where you choose both the export fields and the file format.
In the upper-right corner, you can refresh the data and clear the filter.

Working with date filters
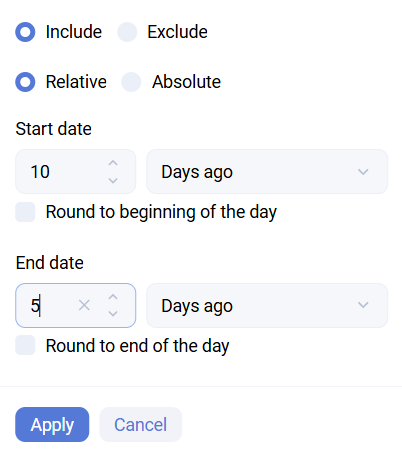
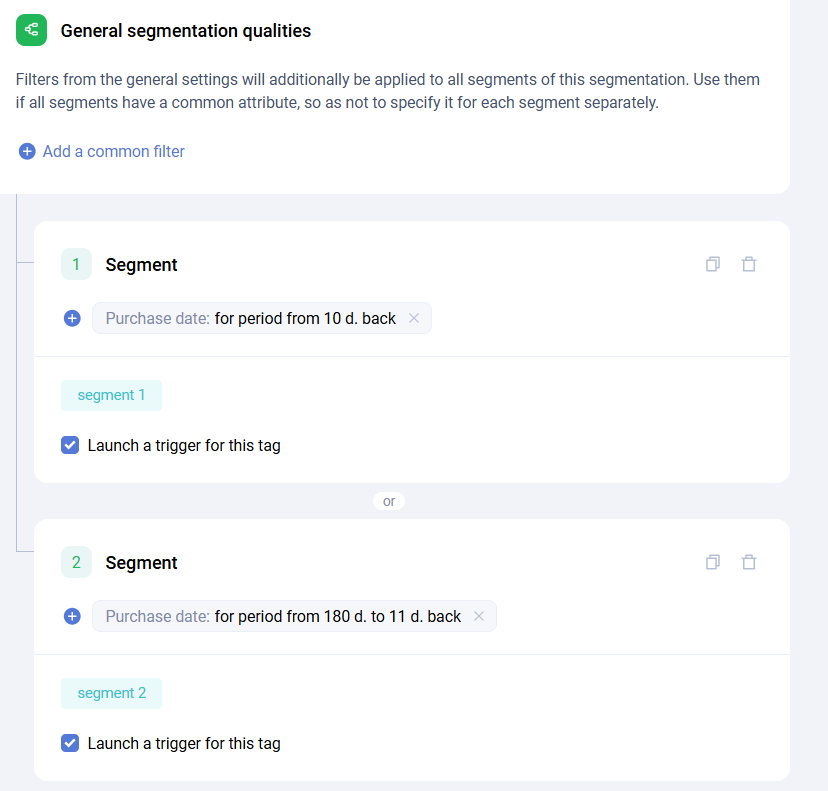
Using the Purchase date filter as an example, this type of filtering can be configured to select the required period during which users made purchases. You can specify either relative periods, for example a purchase from 10 to 5 days ago, or absolute dates.
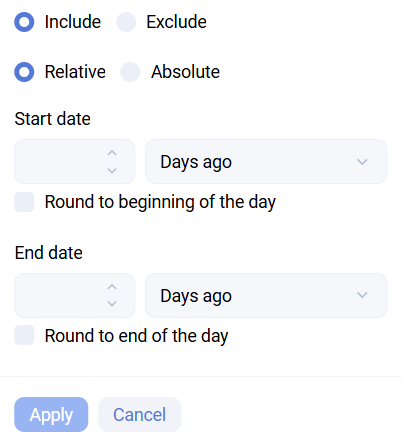
It is also possible to select a period during which users did not make purchases. To do this, enable Exclude in the filter settings.
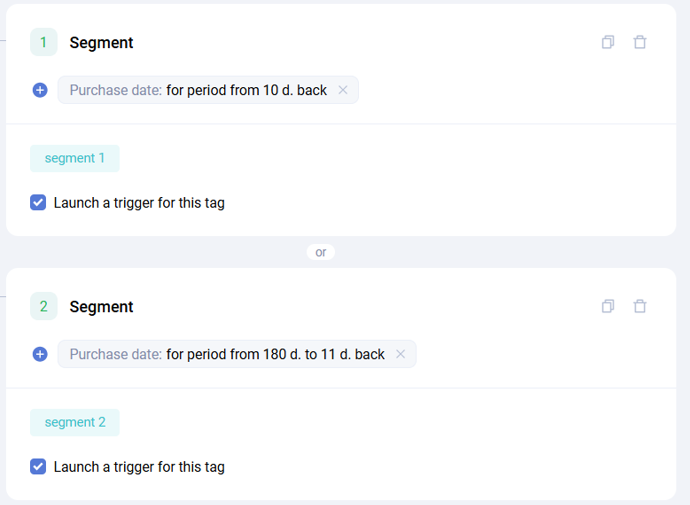
For relative periods, it is useful to imagine the period as a timeline. For example, suppose you need a segment of users who made purchases from 10 to 5 days ago.
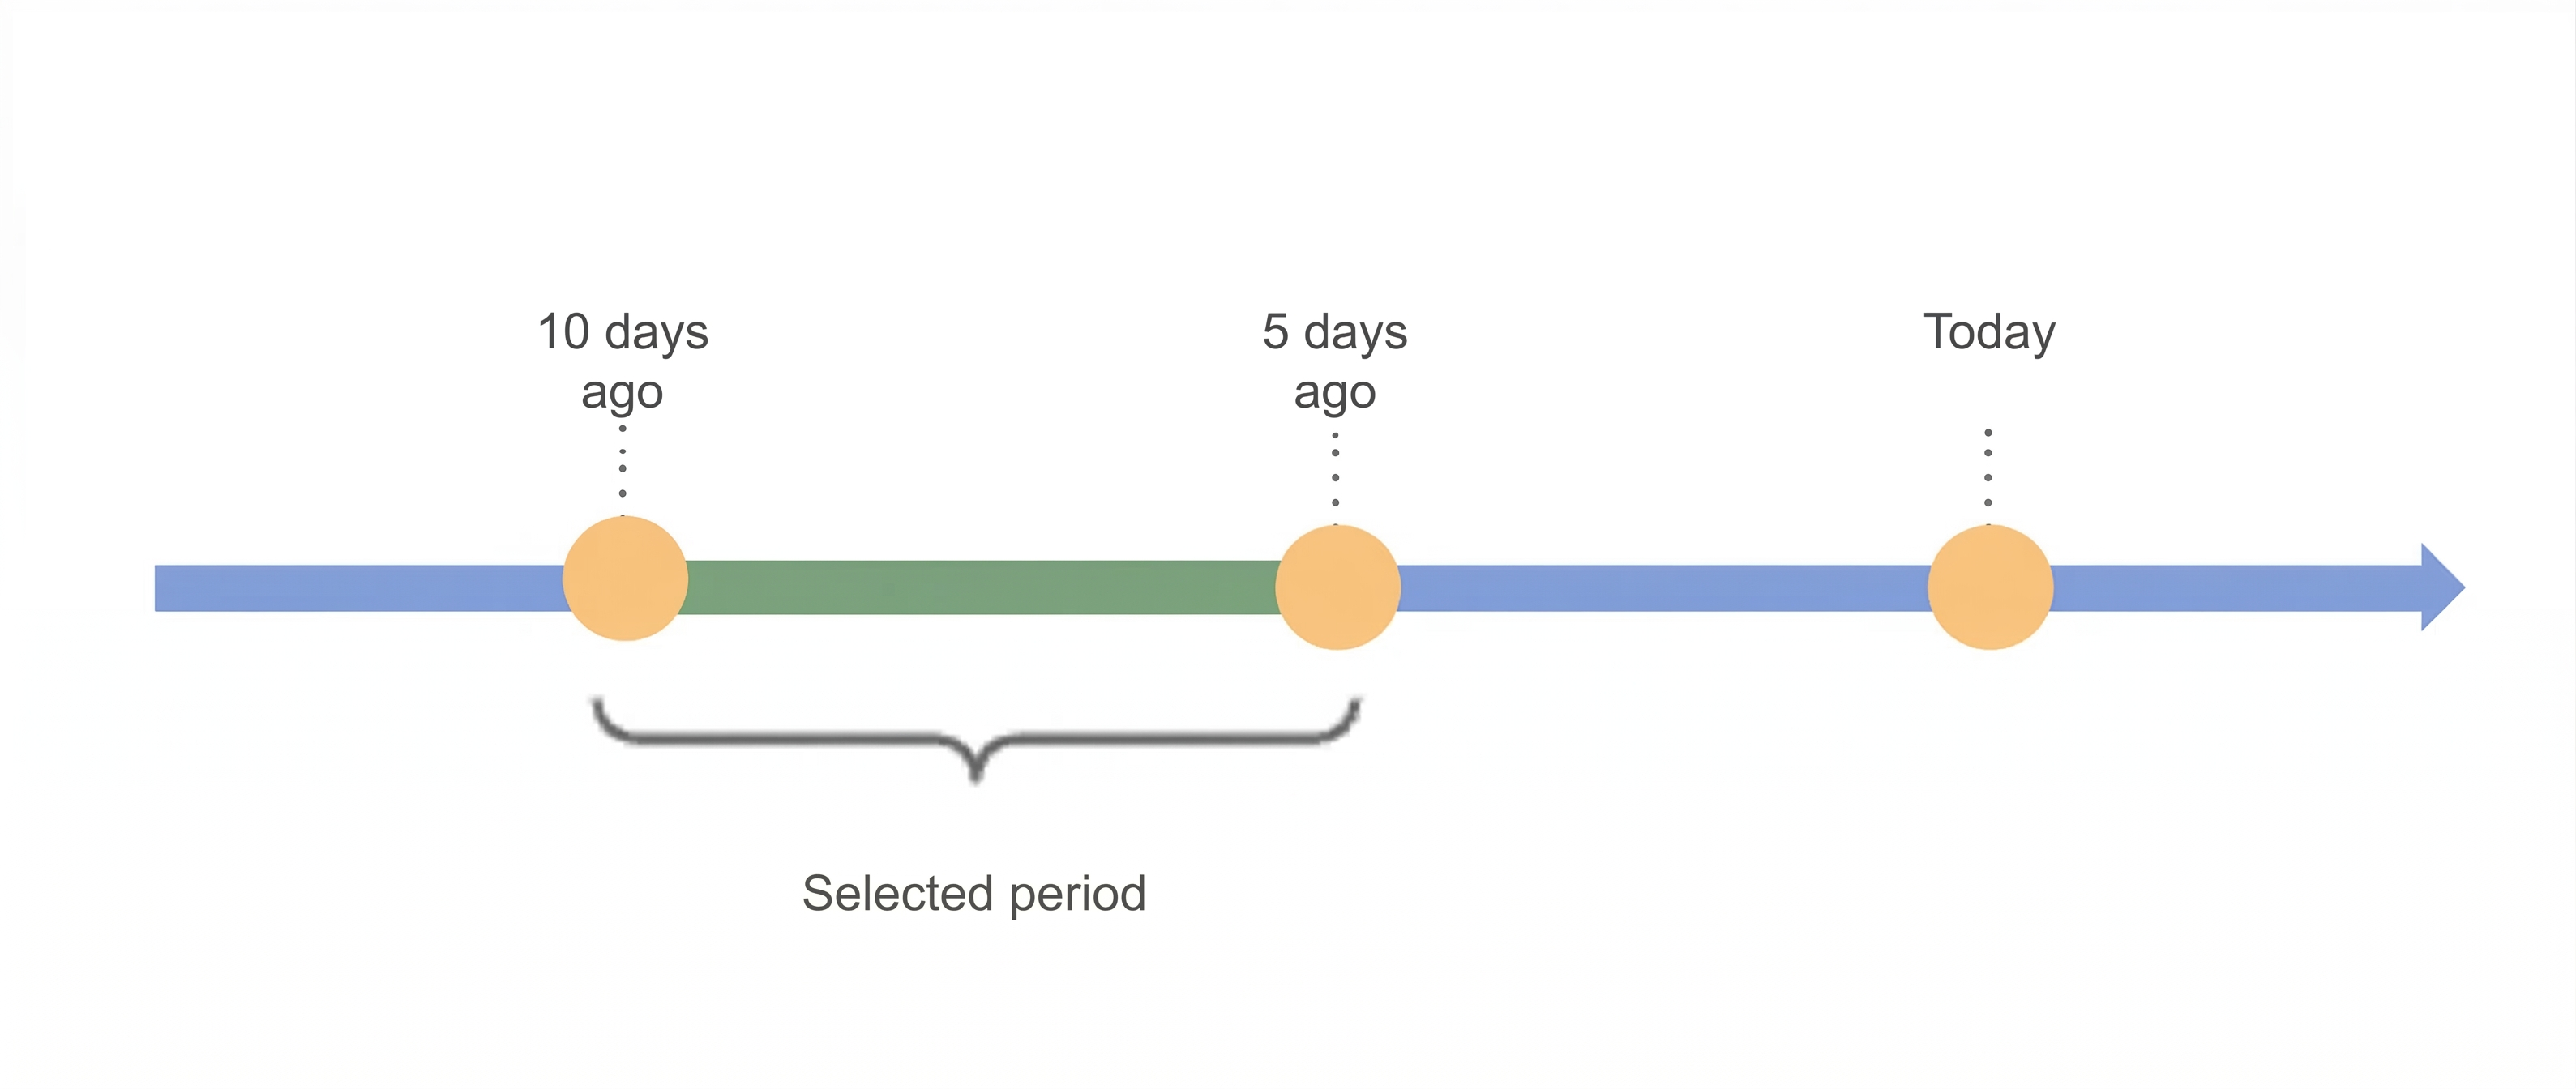
The filter configuration would then look like this:
Client card
Each client in the CDP database has a card where all data collected for that client across the selected identifiers is aggregated into a single profile.
Client identifiers
In Sailplay, any unique client parameter can be used as an identifier, as long as it is also used in your business systems such as the website, POS, or call center.
By default, the primary identifiers are the client's phone number (user_phone), email, and ID in your system (origin_user_id), which can be any external identifier stored or generated on the partner side.
A client can be identified by one parameter or by a combination of several parameters, for example Phone number and email or user_id, phone number, and email.
This means that data from different sources can be merged into one client card.
Example: if a partner operates both a website and retail stores, the client may be identified by phone number in retail and by email on the website.
In this example, the merge will work only if the website also collects the required phone number field, making it possible to merge the client data from both sales channels.
Another supported identifier is visitor_id. visitor_id is the user identifier from the Retail Rocket platform. It can be used in Sailplay when the same partner uses both RR and SP.
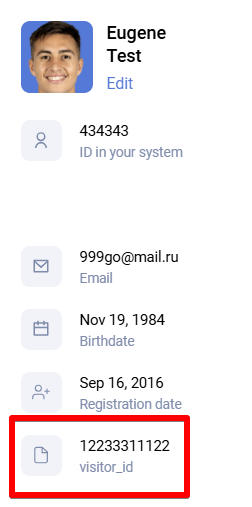
visitor_id makes the following scenarios possible- Merging client data collected by Retail Rocket on the website or in the mobile app with Sailplay client data
- Using recommendation algorithms in email mailings and trigger scenarios that come from Retail Rocket
- Launching trigger chains based on Retail Rocket events such as abandoned cart or NBO
General information
To open the client card, click the corresponding row in the client list.

The client card includes the following blocks:
- client personal data and identifiers
- action block for the client
- client purchase data and business metrics
- loyalty program block
- subscription statuses for the main communication channels
- full interaction history
- client tags
- assigned attributes and variables
- additional comments, notes, and SMS send history
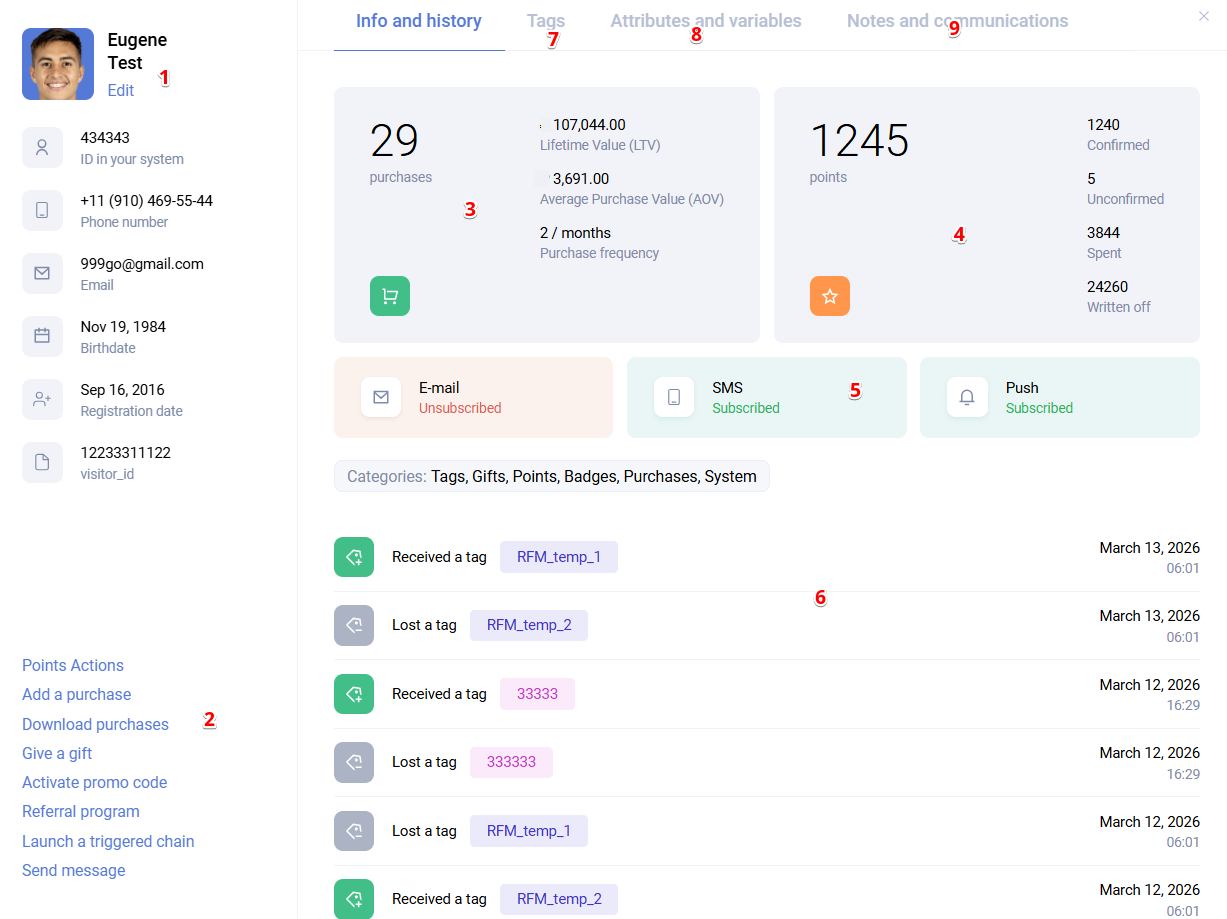
The following actions are also available for an individual client:
- Edit data - edit personal data, identifiers, and gender
- Add purchase - manually create and add a purchase to the client using the cart icon in the purchase block
- Point actions - accrue or deduct points with expiration settings, or transfer points from one client to another
- Download purchases - export all purchases of the client with flexible field selection, similar to the Download feature in the general CDP Clients section
- Issue gift - manually add a gift to the client in the system. In production use, gifts are usually issued through integration or a trigger scenario
- Activate promocode - apply a promocode for the client from a selected promocode group. This works only for activation-type promocodes
- Referral program - view active referral relationships, including invited clients and the inviter. New referral links can also be created or deleted here
- Launch trigger - manually launch a trigger scenario for the client by assigning the tag that starts the configured chain
- Send message - send a direct communication to the client via email or SMS. For email, only the standard WYSIWYG editor is used here, not Stripo
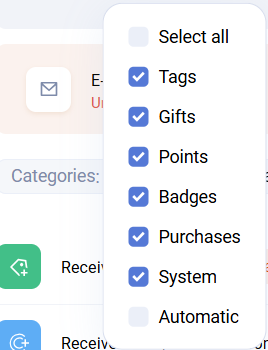
The interaction history view can be customized by choosing which elements should be displayed. This is useful when you need to focus on specific types of client activity, such as purchases.
Additional details can be opened for several history elements.
Tags
If you click a tag that was assigned to or removed from the client, you can see additional information and tag parameters (params).
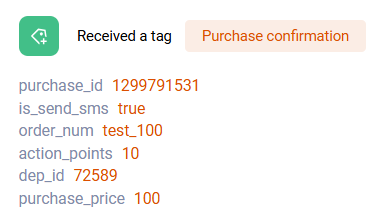
Example: the system tag Purchase count, which is assigned when a purchase is confirmed. Its parameters can include:
| Parameter | Description |
|---|---|
purchase_id | Purchase ID |
is_send_sms | Whether SMS was sent (true / false) |
order_num | Purchase number |
action_points | Number of accrued bonus points |
dep_id | Department ID |
purchase_price | Purchase amount |
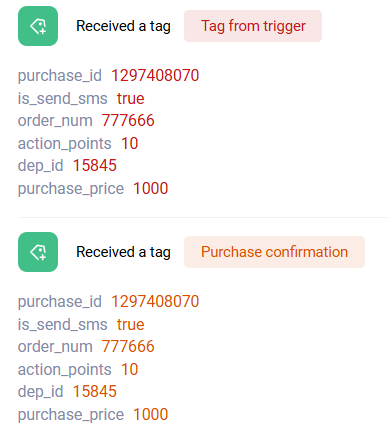
All custom tags assigned inside triggers based on the system tags Purchase or Purchase count inherit the parameters of the original start tag.
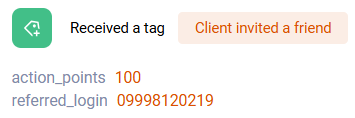
Parameters of the system tag used when inviting a friend:
| Parameter | Description |
|---|---|
action_points | number of accrued bonus points |
referred_login | identifier of the invited client |
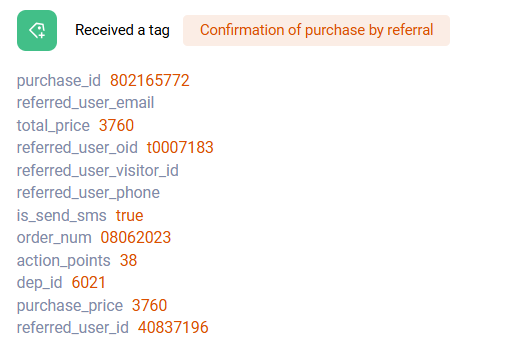
For non-system tags, the set of parameters can vary significantly. Tags can also store additional business data that matters for a specific scenario.
Examples include:
- the unsubscribe channel
- a link to an image
- the promocode group from which a code was activated
- referral relationship details
- additional parameters of Retail Rocket behavioral events


In addition to system parameters, custom parameters can also be passed in tags. They can then be used in different scenarios, such as service or transactional emails.
Purchases
Clicking the purchase number opens the detailed purchase information.

Automatic
The Automatic category shows system tags assigned to clients automatically based on specific actions.
Examples include receiving a mailing, opening a mailing, meeting or failing a trigger condition, webhook execution status, inviting a friend, making a purchase, or a birthday event.
Tags
The Tags section shows all tags currently assigned to the client. Removed tags are not shown here. To see them, go back to Info and history.
In the Tags section, you can assign a tag using + Add tag. Search is also available for convenience.
Hovering over an assigned tag shows a cross icon that removes that tag from the client.
Assigning a tag through + Add tag does not launch a trigger.
Attributes and variables
The Attributes and variables section contains additional data related to the client.
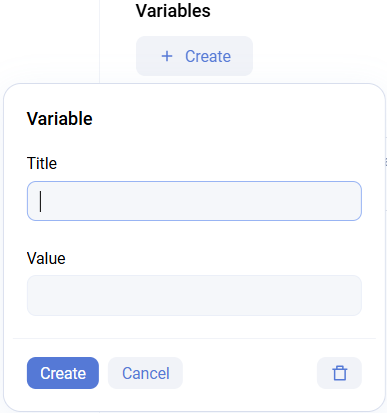
A variable is additional text-based information assigned to the client. Each variable has a name and a value.
The main use case for variables is personalized communication: email, SMS, receipt printing, displaying information in a website dashboard or mobile app, and so on.
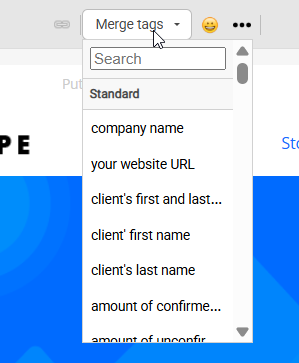
For email, variables can be used not only in the message body, but also in the subject or URL.
Sailplay supports two types of variables:
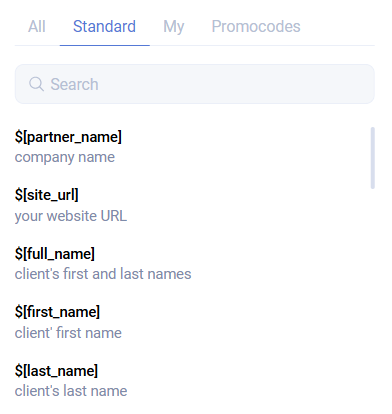
- System variables - standard variables containing general information about the client and the action being performed
The list of standard variables is available in the places where they are used, for example in communication channels.
- Custom variables - contain additional information about the client. Each client stores their own value for such a variable.
The variable name and value are defined by the user and can contain any information the company wants to keep there.

One common example is a variable such as Client address. During integration, the company can pass address data from the website, mobile app, or other sources and save it into the Address variable for each client.
Clicking the copy icon next to the variable name copies the formatted variable to the clipboard. In this example, it looks like custom_vars["Address"].
When a communication is sent, Sailplay reads the variable of each client and inserts its value into the message.
A variable can be created and assigned to a client:
- through the API
- through bulk client upload
- through the client card
Use + Create in the corresponding section.
The variable itself can be shared across multiple clients, while the value remains unique per client.
For any variable, you can also specify a fallback value that is used if the client does not have the variable or its value is empty.
For example, if the client has no first name, but the communication should still address them politely, the variable can be written as $[first_name|Dear client].
Attributes
An attribute is a predefined list of additional client characteristics and properties. Each attribute name has a predefined list of possible values configured for the partner.
One common example is the Favorite product attribute, whose values are products that can be selected as favorites.
Existing attributes can be assigned to clients:
- through the API
- through bulk client upload
- through the client card
Use + Create in the corresponding section.

Main differences between attributes and variables:
- in the Sailplay interface, a variable value can be any text, while attribute values are chosen from a predefined list
- attributes can be used in client filtering in the CDP Clients section
- client attributes can be used in promotion conditions
Notes and communications
The Notes and communications section contains SMS and Viber communications with the client, including the message text.

It is also possible to add a note or comment for the client:

Auto-segmentation
Sailplay supports several ways to create segments or add clients to a segment:
- manually, by assigning a segment tag to clients in the Client list or in the client card
- through the API, which is usually part of the integration logic
- through Promotions, where a reward can assign a tag to a client
- through Triggers, using the Assign tag block
- automatically, using the auto-segmentation tool
Auto-segmentation is a tool for automatic work with client segments. The result of a segmentation run is assigning or removing a tag or attribute for a client according to the selected rules.
On the start page of the Auto-segmentation section, you can see:
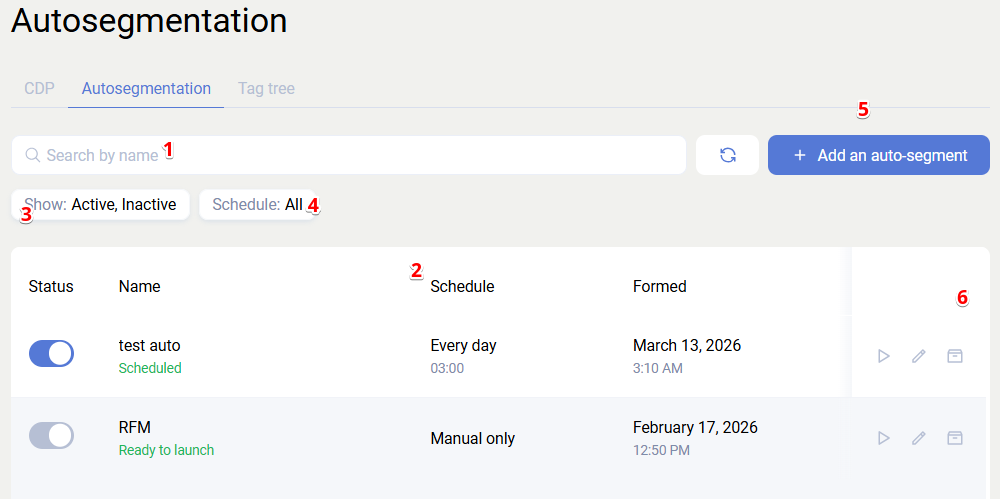
- search across configured auto-segmentations
- the full list of created auto-segmentations
- a filter by auto-segmentation status: all, active, inactive, archived
- a filter by auto-segmentation frequency: all, daily, weekly, monthly, manual
- creation of a new auto-segmentation
- actions for an auto-segmentation: edit, enable, disable, manual launch, archive
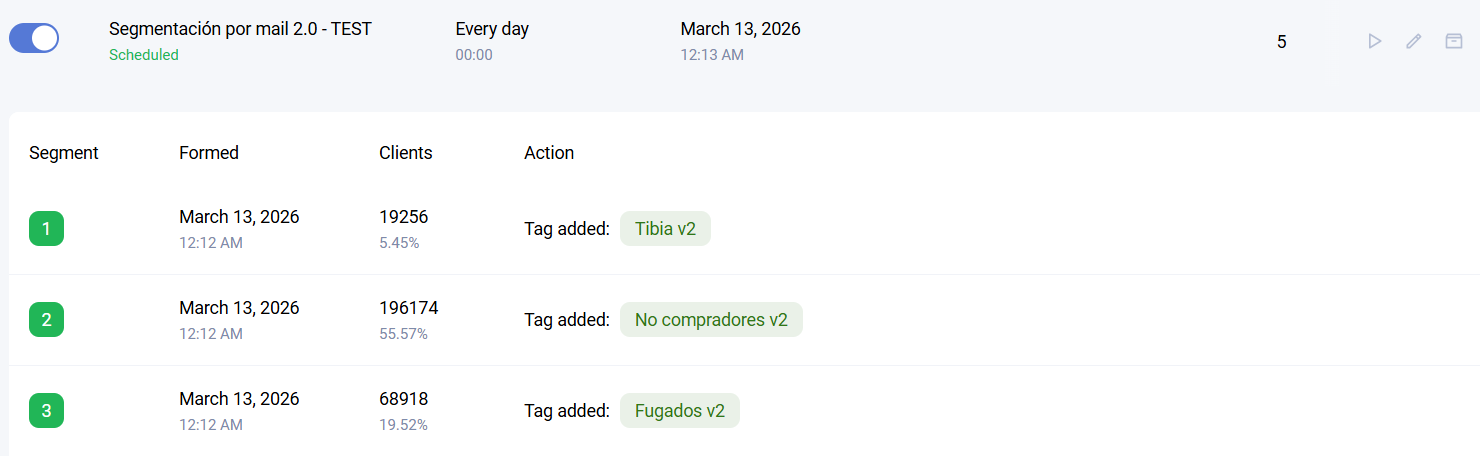
Clicking Segment opens additional information showing the segment generation status, generation date, and the share of each segment.
When creating auto-segmentation, fill in the required settings:
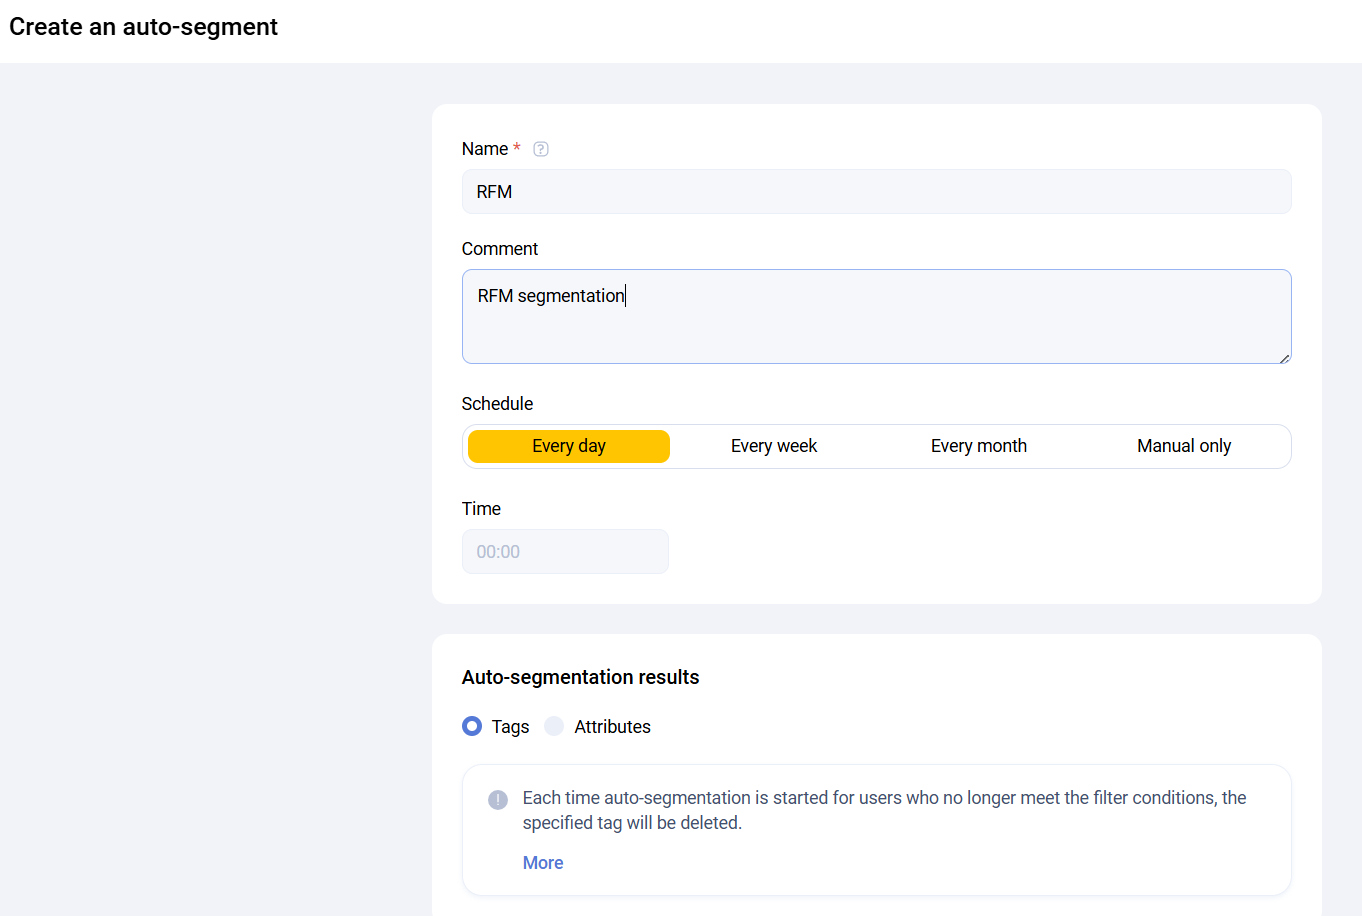
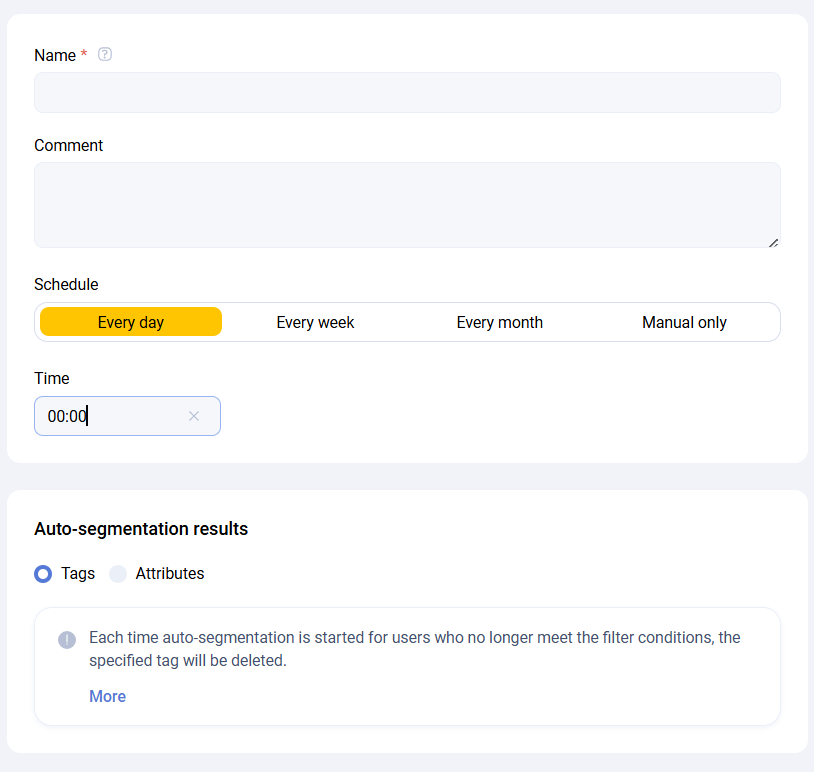
General settings
-
Name - the auto-segmentation name displayed in the list
-
Comment - an internal comment about the created auto-segmentation
-
Schedule - the segmentation frequency can be configured flexibly:
-
every day at a specific time
-
every week on a specific weekday at a specific time
-
every month on a specific day of month at a specific time
-
manual, where segmentation runs only when started manually from the dashboard
-
Segmentation result - the output of auto-segmentation can be either assigned tags or assigned attributes
The One client can belong to several segments parameter means a client may receive several tags or attributes if they match multiple segments inside the same auto-segmentation. If disabled, the client will have only one resulting tag or attribute after segmentation completes.
Segment characteristics
The Segment characteristics block defines the rules used to assign segments to clients. It is divided into two parts:
- general segmentation characteristics
- segment blocks
General segmentation characteristics
The General segmentation characteristics block is used to define rules that apply to all segment blocks below. This avoids repeating the same conditions in every segment.
Example: if you create two segments, Has email and male and Has email and female, the Has email condition can be moved into the general block instead of duplicating it in both segments.
The same filters used in the Clients section are used here.

Segment blocks
Specific segments are configured below using logical OR.
The same filters as in the Client list are used here.
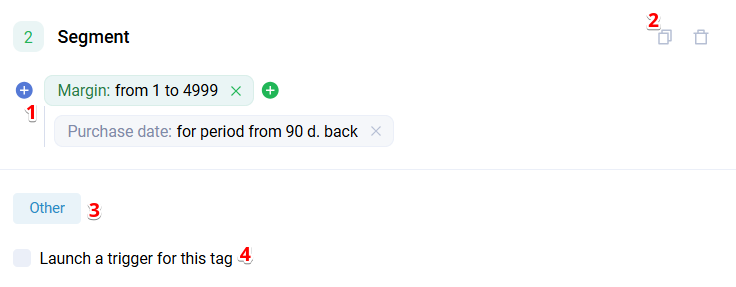
- selecting conditions for a segment profile
- copying a segment block
- selecting the tag or attribute assigned as the segmentation result
- enabling or disabling automatic launch of the trigger scenario connected to the selected tag
When the Aggregation filter is added, additional purchase filters can be specified inside it.
In the example, the filter selects clients whose last confirmed purchase date was 90 days ago, whose total number of purchases is from 5, and whose total purchase amount is from 50000.
The number of segments inside one segmentation configuration is not limited.
General principle of segmentation logic
On the configured date and time, the segmentation starts and checks the entire client base using the filters from the Segment characteristics block. If a client matches the filters, the corresponding segment tag or attribute is assigned, and all other tags or attributes from the other segment blocks are removed. If One client can belong to several segments is enabled, tags or attributes from other segments are not removed.
Tag tree
The Tag tree section contains the full list of tags in the system. Here you can create and edit tags and their categories.
A tag is a label assigned to clients when they perform a certain action or when they have a characteristic that groups them, such as gender, age, or city.
In Sailplay, tags are a cross-platform entity used in many tools:
- segmentation and filtering
- mailings
- trigger scenarios
- loyalty
- promotions
- analytics
In practice, a tag in Sailplay is also a segment.
Tag = Segment
Tags can be:
- system
- custom
System tags are embedded into the platform logic and tied to the main system events relevant for most clients.
Examples of system tags:
- Actions - purchase, gift issued, mailing received, email opened, promocode used, mailing subscription, registration, and so on
- Characteristics - gender, age, geodata, device name, and so on
System tags are available in the Tag tree immediately after the dashboard is created for a partner.
System tags are assigned automatically according to client actions or available characteristics.
System tags cannot be edited, created, or assigned manually.
Automatically created tags are tags that are created and assigned to the client automatically after certain actions, such as email sent, user clicked a link, events of individual trigger blocks, promocode usage, and so on.
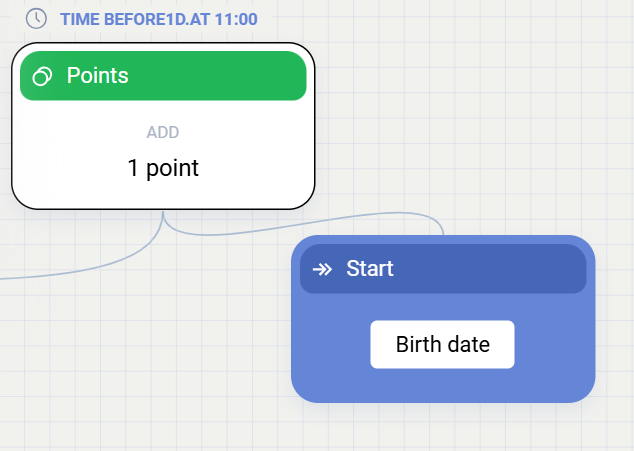
Birthday tag
This is a system tag directly linked to the system birth date field of the client. It has special trigger logic that allows blocks to be scheduled before the actual start event, which makes it suitable for birthday greeting scenarios.
Purchase tag
This system tag is assigned every time a client's purchase is created in Sailplay. As a counter tag, its value effectively equals the number of client purchases, assuming purchases are not created as already confirmed by default.
Purchase count tag
This system tag is assigned every time a client's purchase is confirmed, either automatically or through an external partner request. As a counter tag, its value effectively equals the number of confirmed client purchases.
Custom tags are created by the partner according to business needs. They can be created in several ways:
- manually, through client list or client card operations
- through the API
- through Promotions, where a reward assigns a tag
- through Triggers, where the Assign tag block is used
- automatically, through auto-segmentation
Tags are a highly flexible entity that allows the client's business logic to be adapted to work inside the platform.
There is no limit on the number of custom tags.
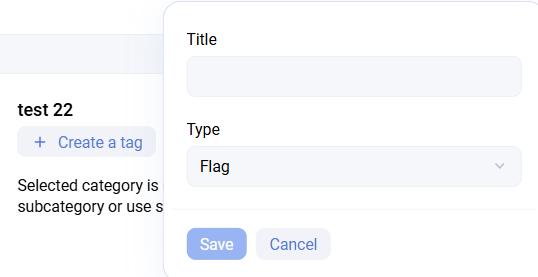
Tag types
There are three tag types:
- Flag - the client either has the tag or does not. The same tag cannot be assigned twice.
- Counter - can be assigned multiple times. When removed, the entire tag is removed instead of decrementing. A typical example is
Purchase. - Summator - accumulates numeric data passed in
params. When removed, the tag is removed completely instead of being decremented. A typical example isPurchase amount.
This tag type was used in the past and is no longer used now. It will be removed from the platform interface in the future.
Creating a tag
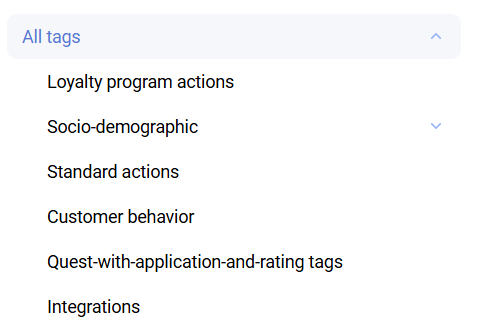
All tags are grouped into categories and subcategories. There are two category types:
- Service - created automatically when the account is created
- User - created by the user in the dashboard
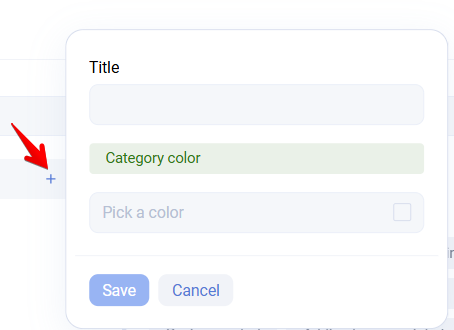
To create a category or subcategory, click the plus icon next to the category name and create it in the modal window with the required name and color.
Tags can be moved between categories using drag and drop.
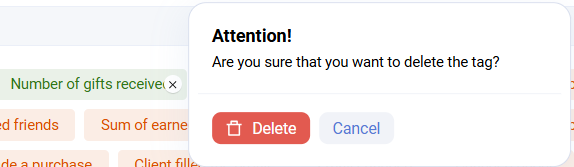
Tags cannot be deleted permanently. Instead, the user can create a separate Deleted category and move unnecessary tags there.
Tags cannot be created inside system categories.
Client upload
Clients can be created in the platform in several ways:
- through the API
- from the Client list using Add and then either Client or Client list
Adding a client
Add -> Client is used to create one client at a time.
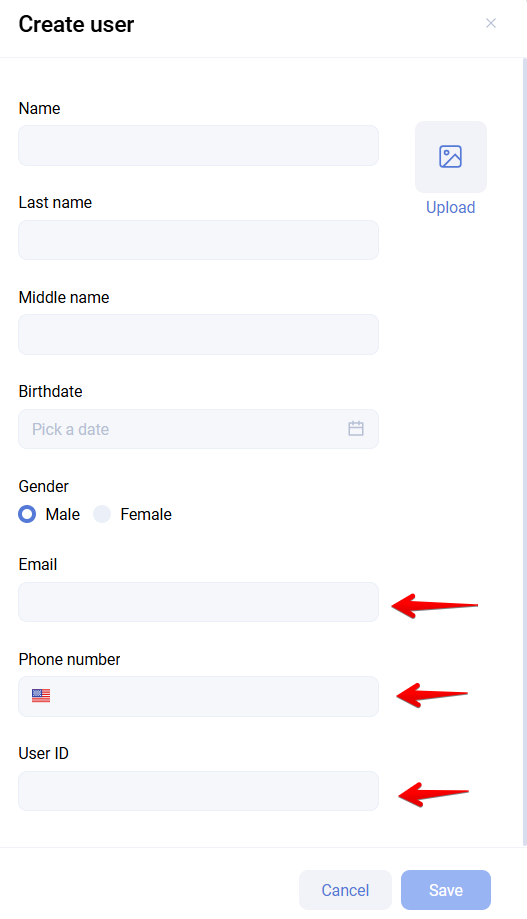
When adding a client, you must specify at least one identifier: email, phone number, or ID in your system.
When a client is created through Add -> Client, the client receives the Loyalty program registration tag.
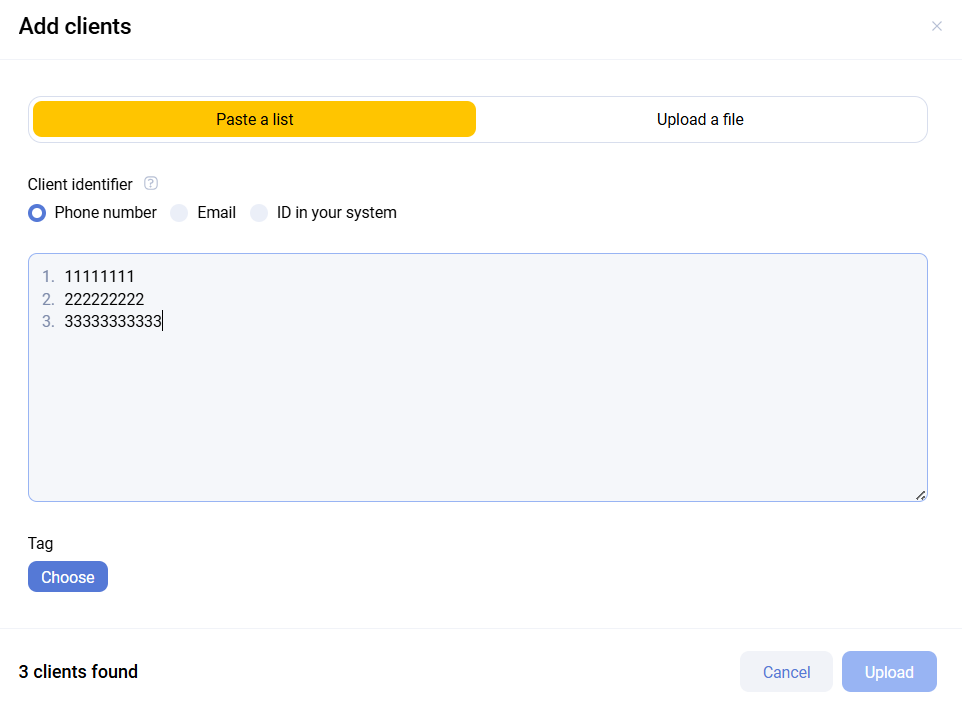
Paste a list
Clients can be uploaded by list using Paste a list, after choosing the identifier type first. Up to 1000 rows can be pasted at once.
Upload file
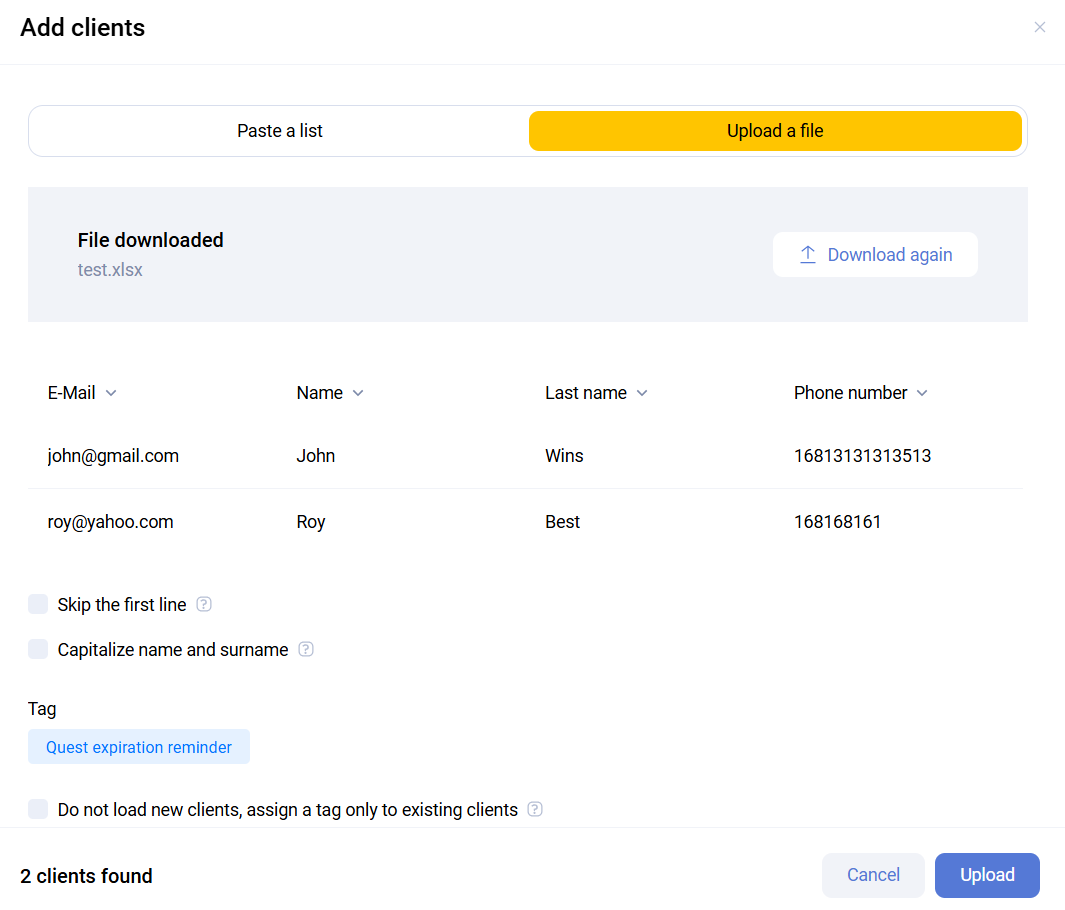
Clients can also be uploaded from a file. The header row may remain in the file, but then Skip first row must be enabled.
Next, match each uploaded column to the field it should be loaded into, using the dropdown list. Each column must either be matched or marked as Do not use.
Then choose the tag that will be assigned to clients after the upload. Upload without a tag is not possible.
If the client already exists in the system, the platform assigns the selected tag to that client.
After selecting a tag, additional options appear:
- Do not upload new clients, assign tag only to existing ones - used when the tag should be assigned only to existing clients
- Launch trigger scenario for the selected tag - must be enabled if the tag assigned during upload should also launch a trigger for new or existing clients. If disabled, the tag is assigned but the trigger is not started
When clients are uploaded through Upload clients or Upload client list, new clients do not receive the Loyalty program registration tag.